Torus Wallet
Make sure you have a Torus wallet set up and ready to use. You can find a guide on how to set up a wallet here.
In this guide, we’ll walk through the process of staking and allocating your TORUS with the Torus Allocator.
Staking your TORUS allows you to earn emission rewards while supporting agents you believe in, contributing to network security, and participating in the decentralized allocation of network resources.
Torus Wallet
Make sure you have a Torus wallet set up and ready to use. You can find a guide on how to set up a wallet here.
Torus Balance
Check your balance on the Torus Wallet and ensure you have enough Free Balance to cover the registration fees. You can find a guide on how to bridge TORUS here.
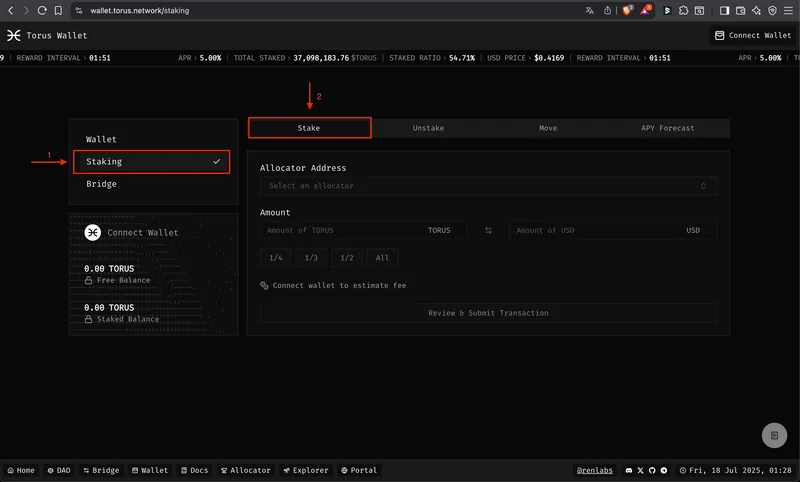
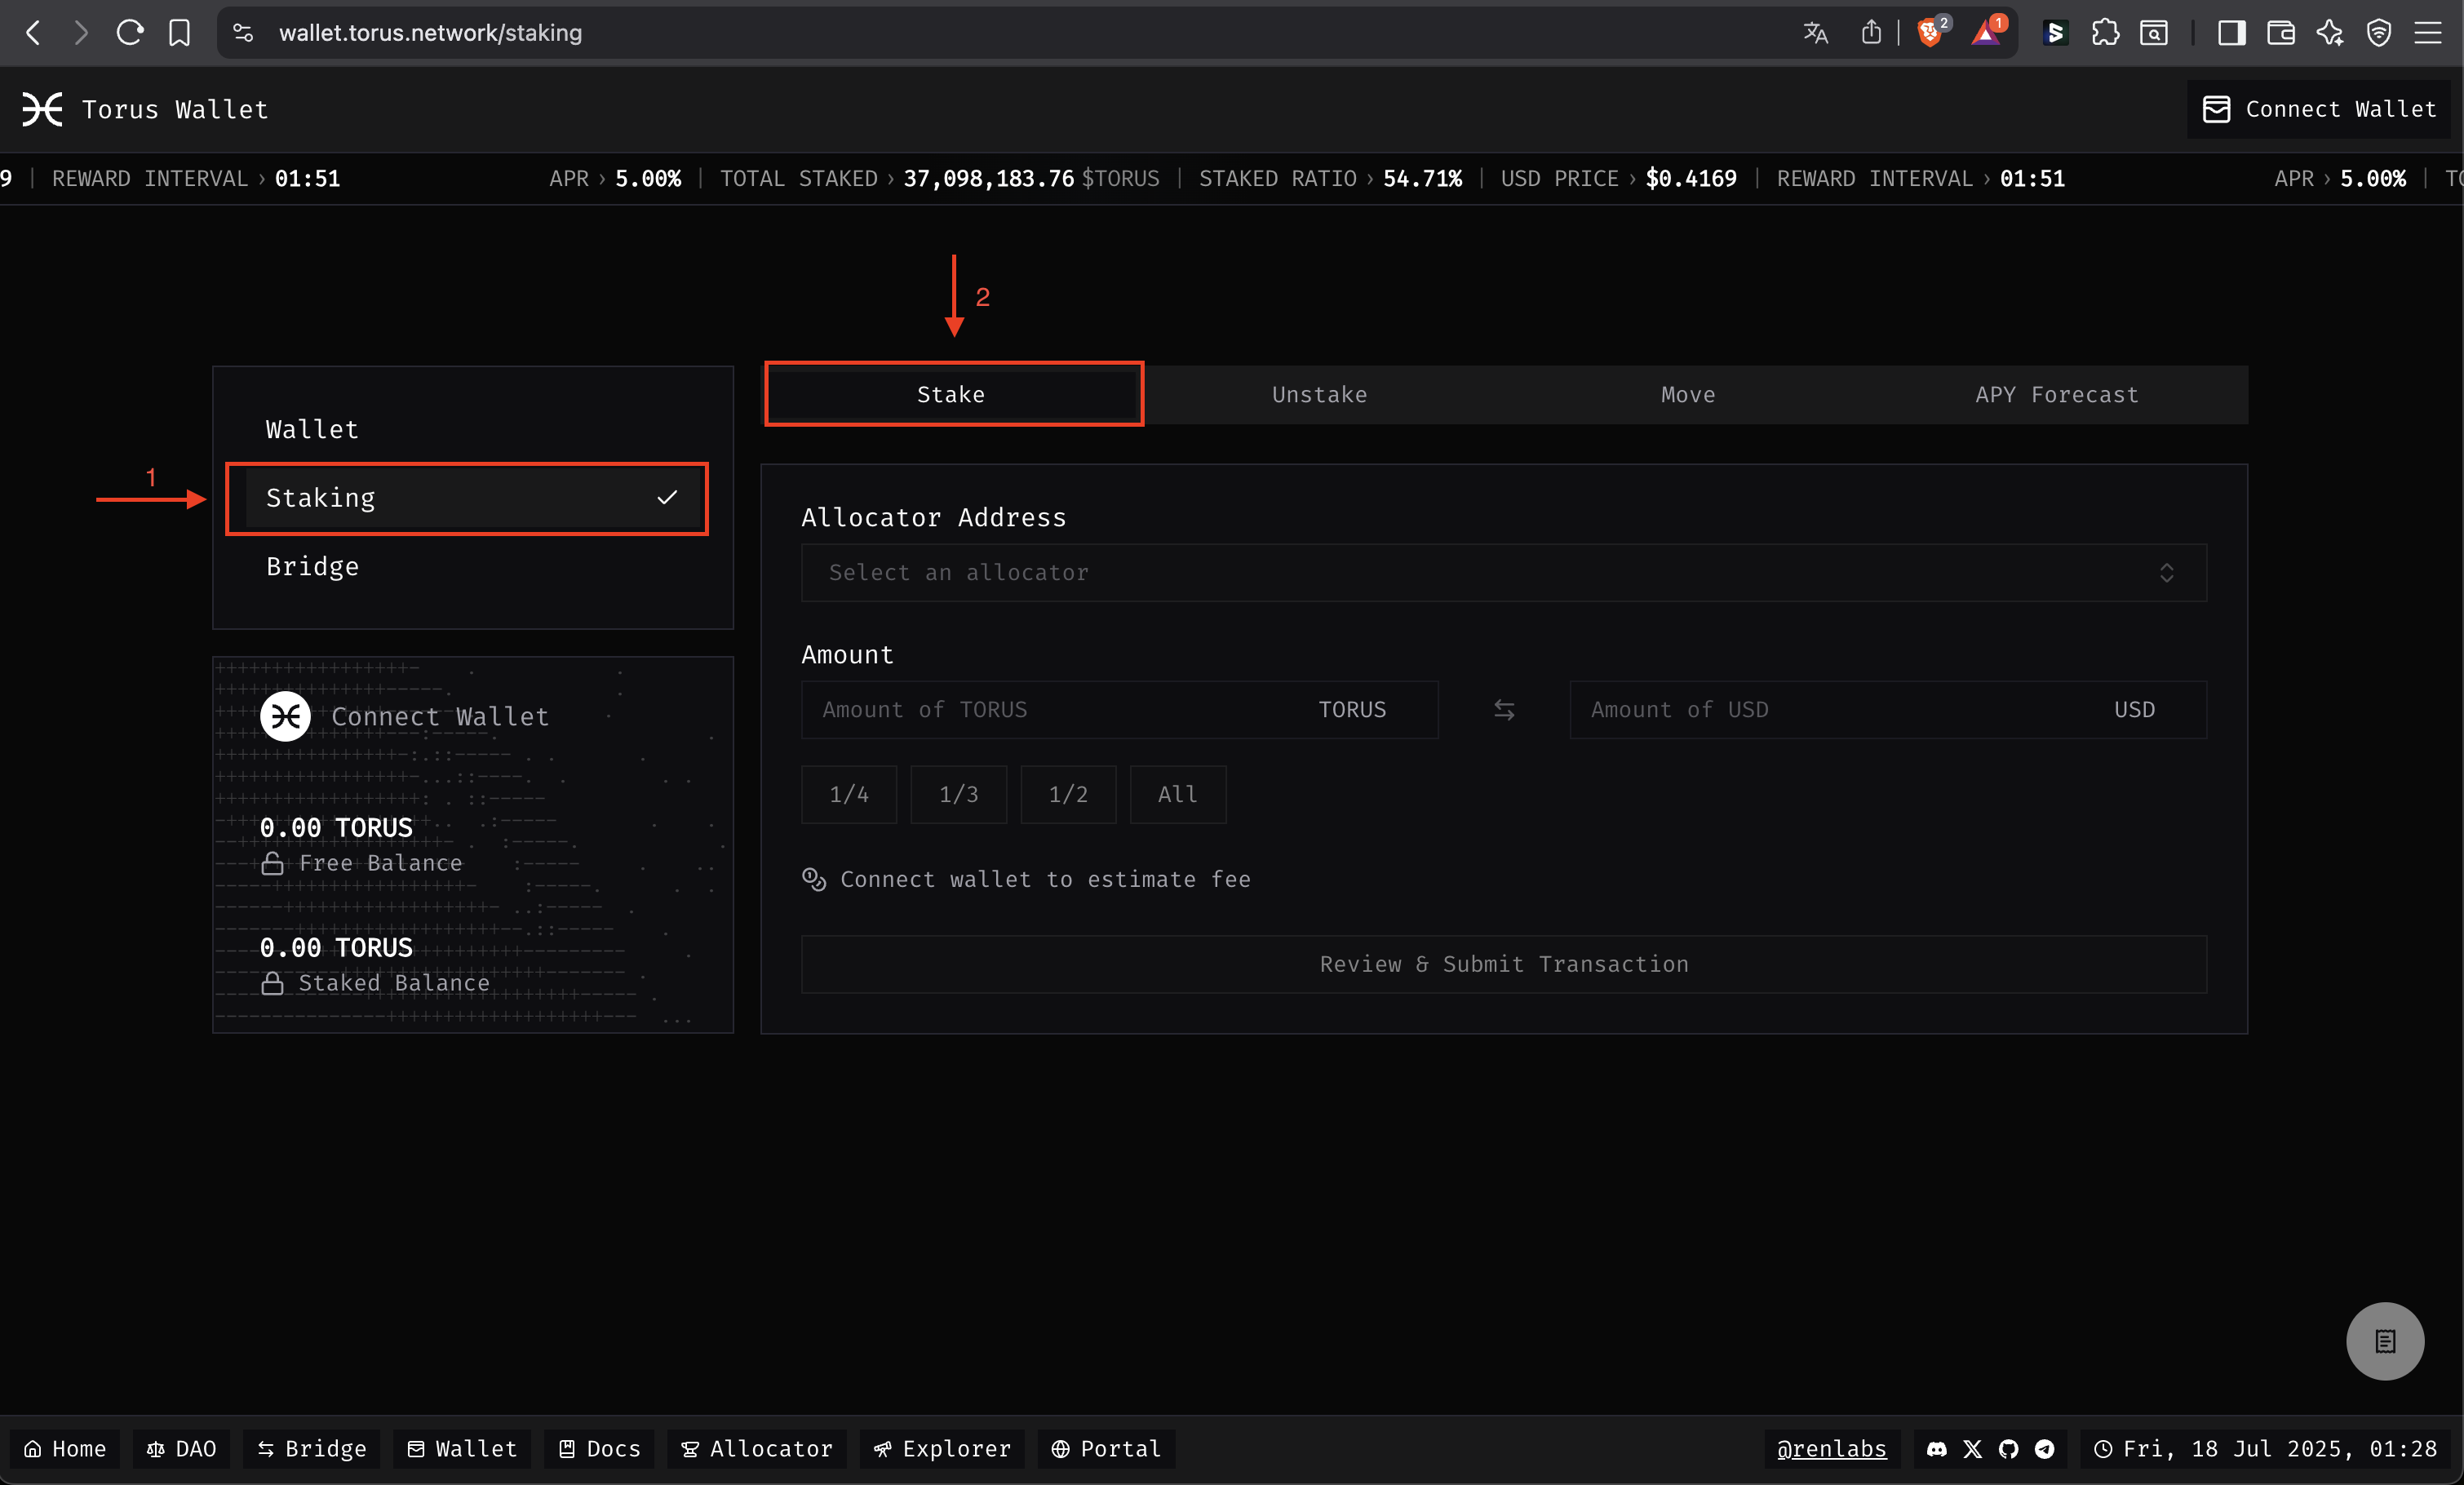
Go to the Staking tab in the Torus Wallet App
In the Torus Wallet App, click on the Staking tab. Then click on Stake.
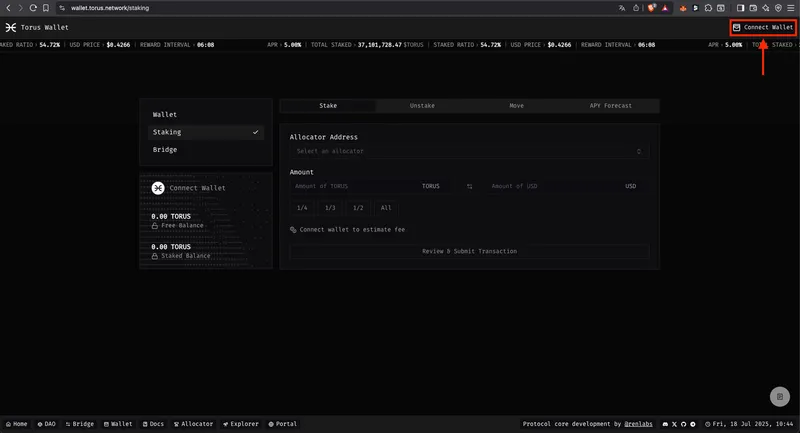
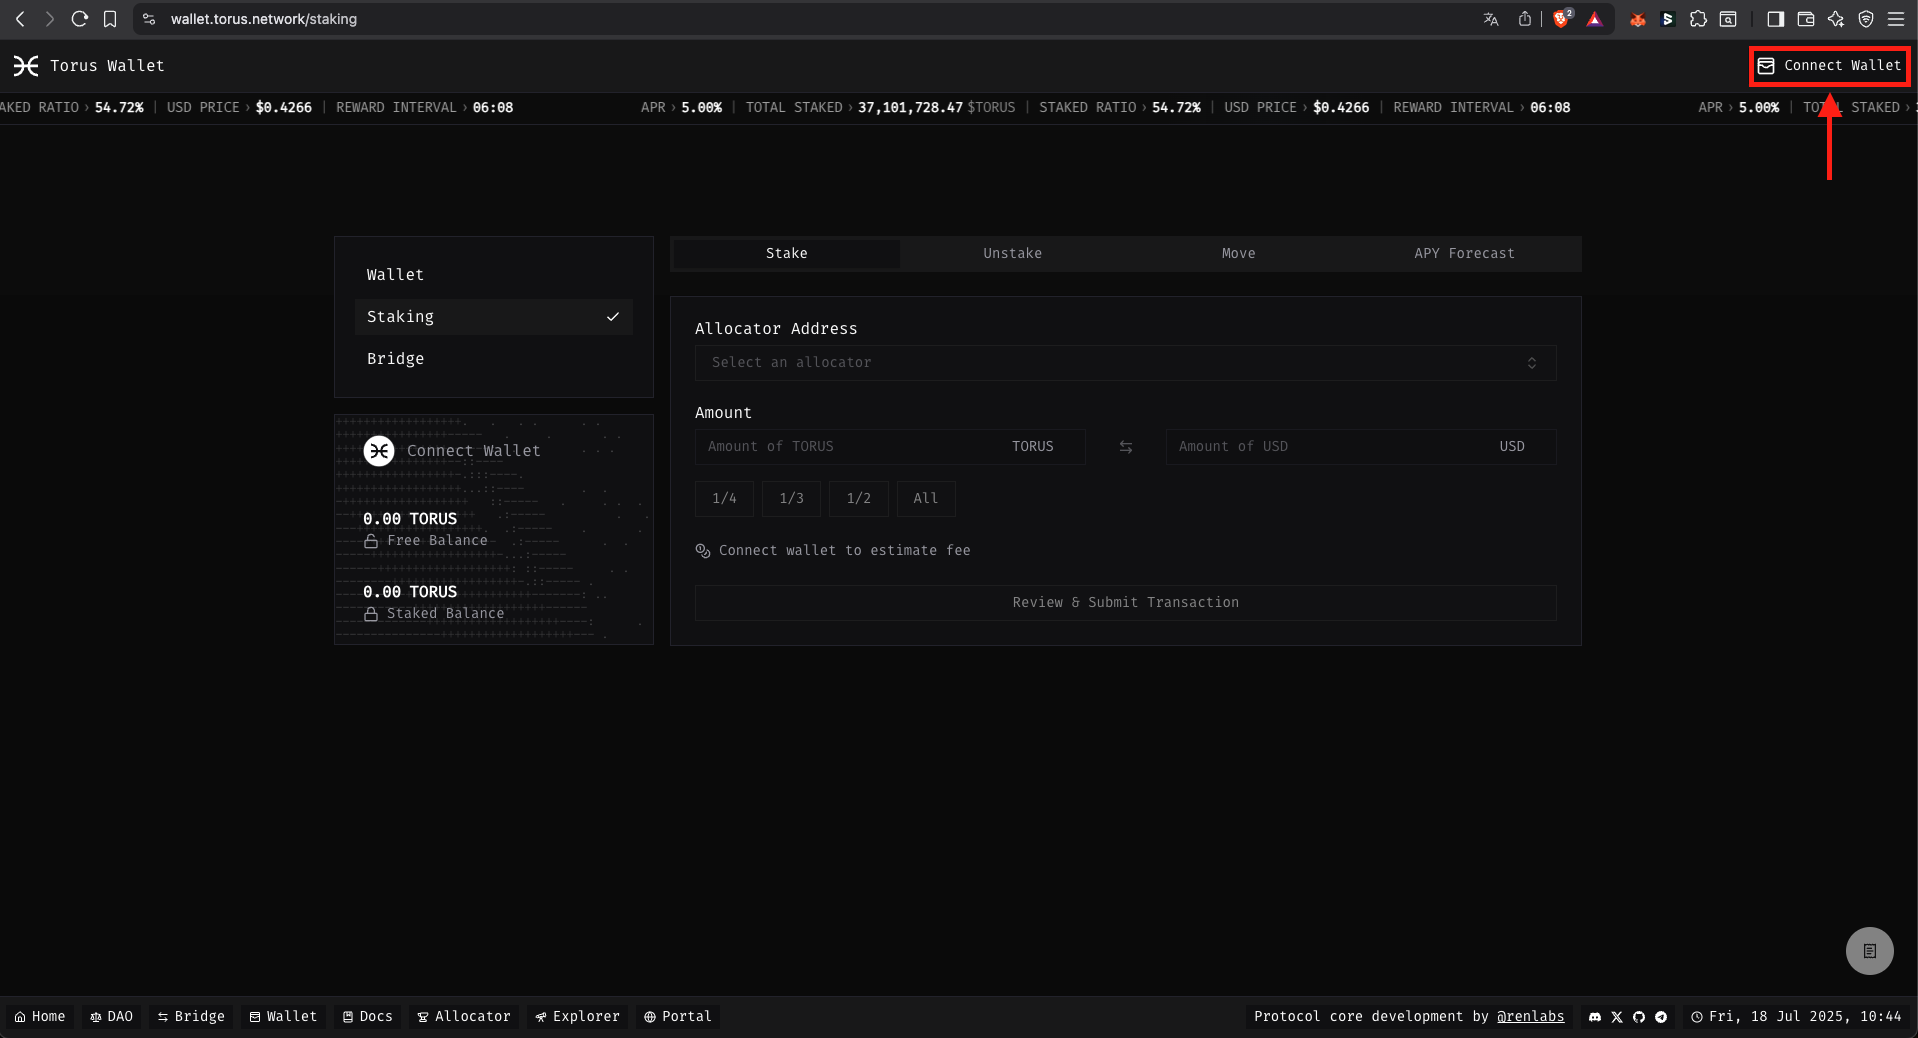
Connect your Torus Wallet
Click the Connect Wallet button at the top right and select your Torus wallet.
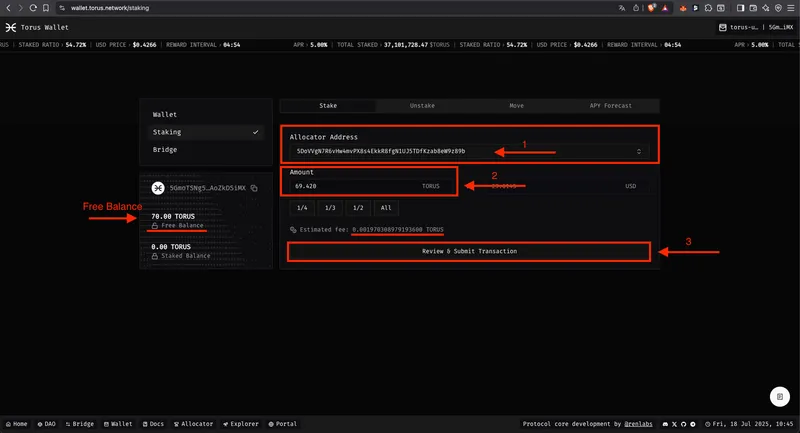
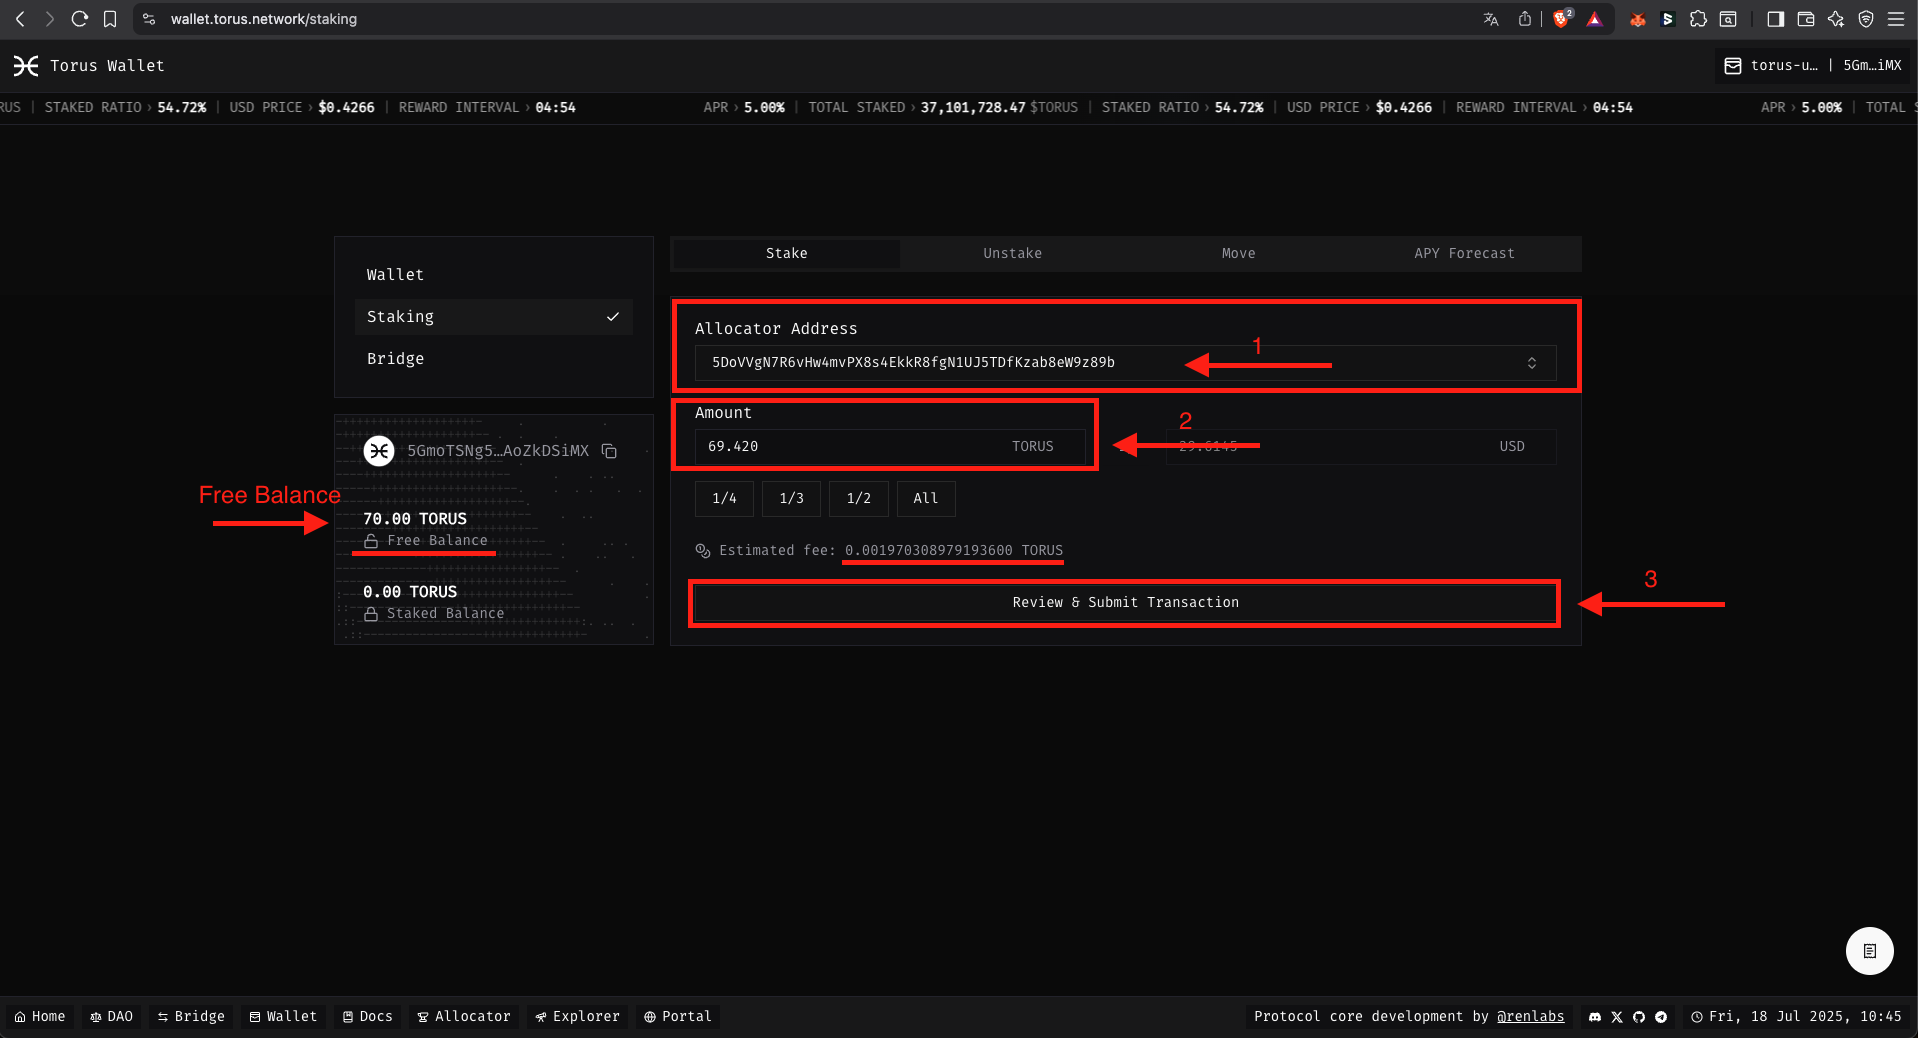
Select the Allocator Address
Click on the Select an Allocator, it will drop a Modal with all the Allocators.
Select the Torus Allocator option.
Fill in the required fields and confirm
After you:
Click on Review & Submit Transaction.
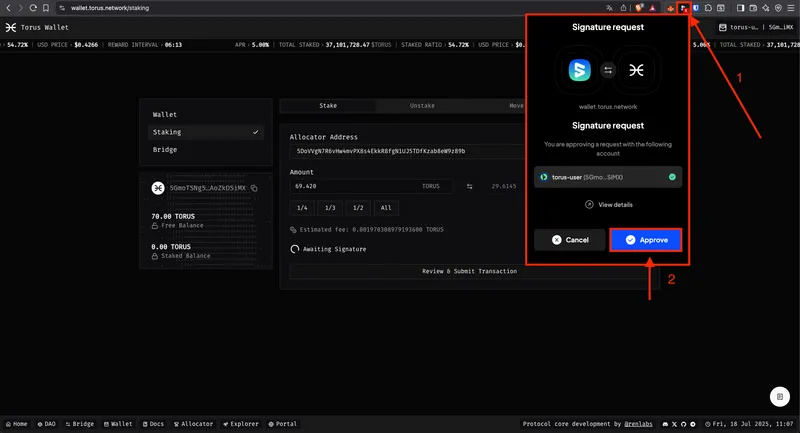
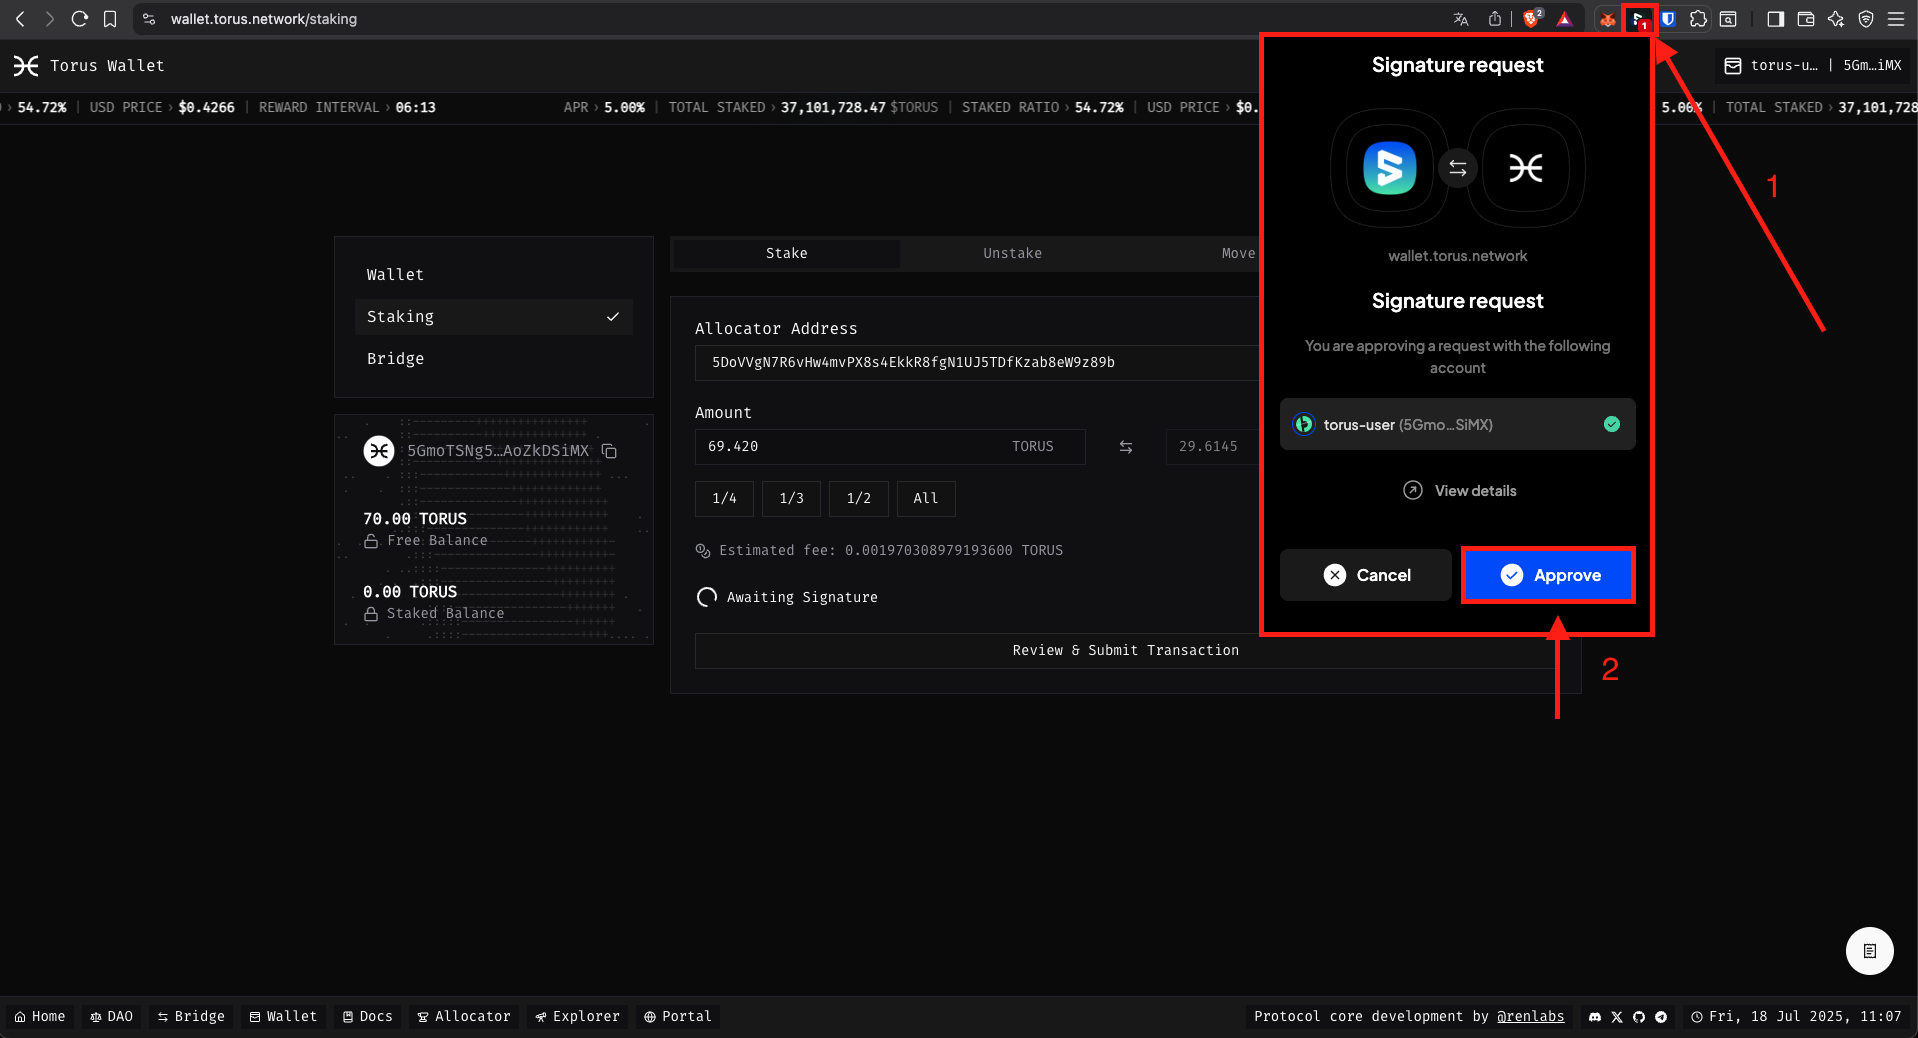
Open SubWallet and Sign the Transaction
Click on the Subwallet icon at the top right navigation bar of your browser.
It will open a modal with the confirmation to sign the transaction.
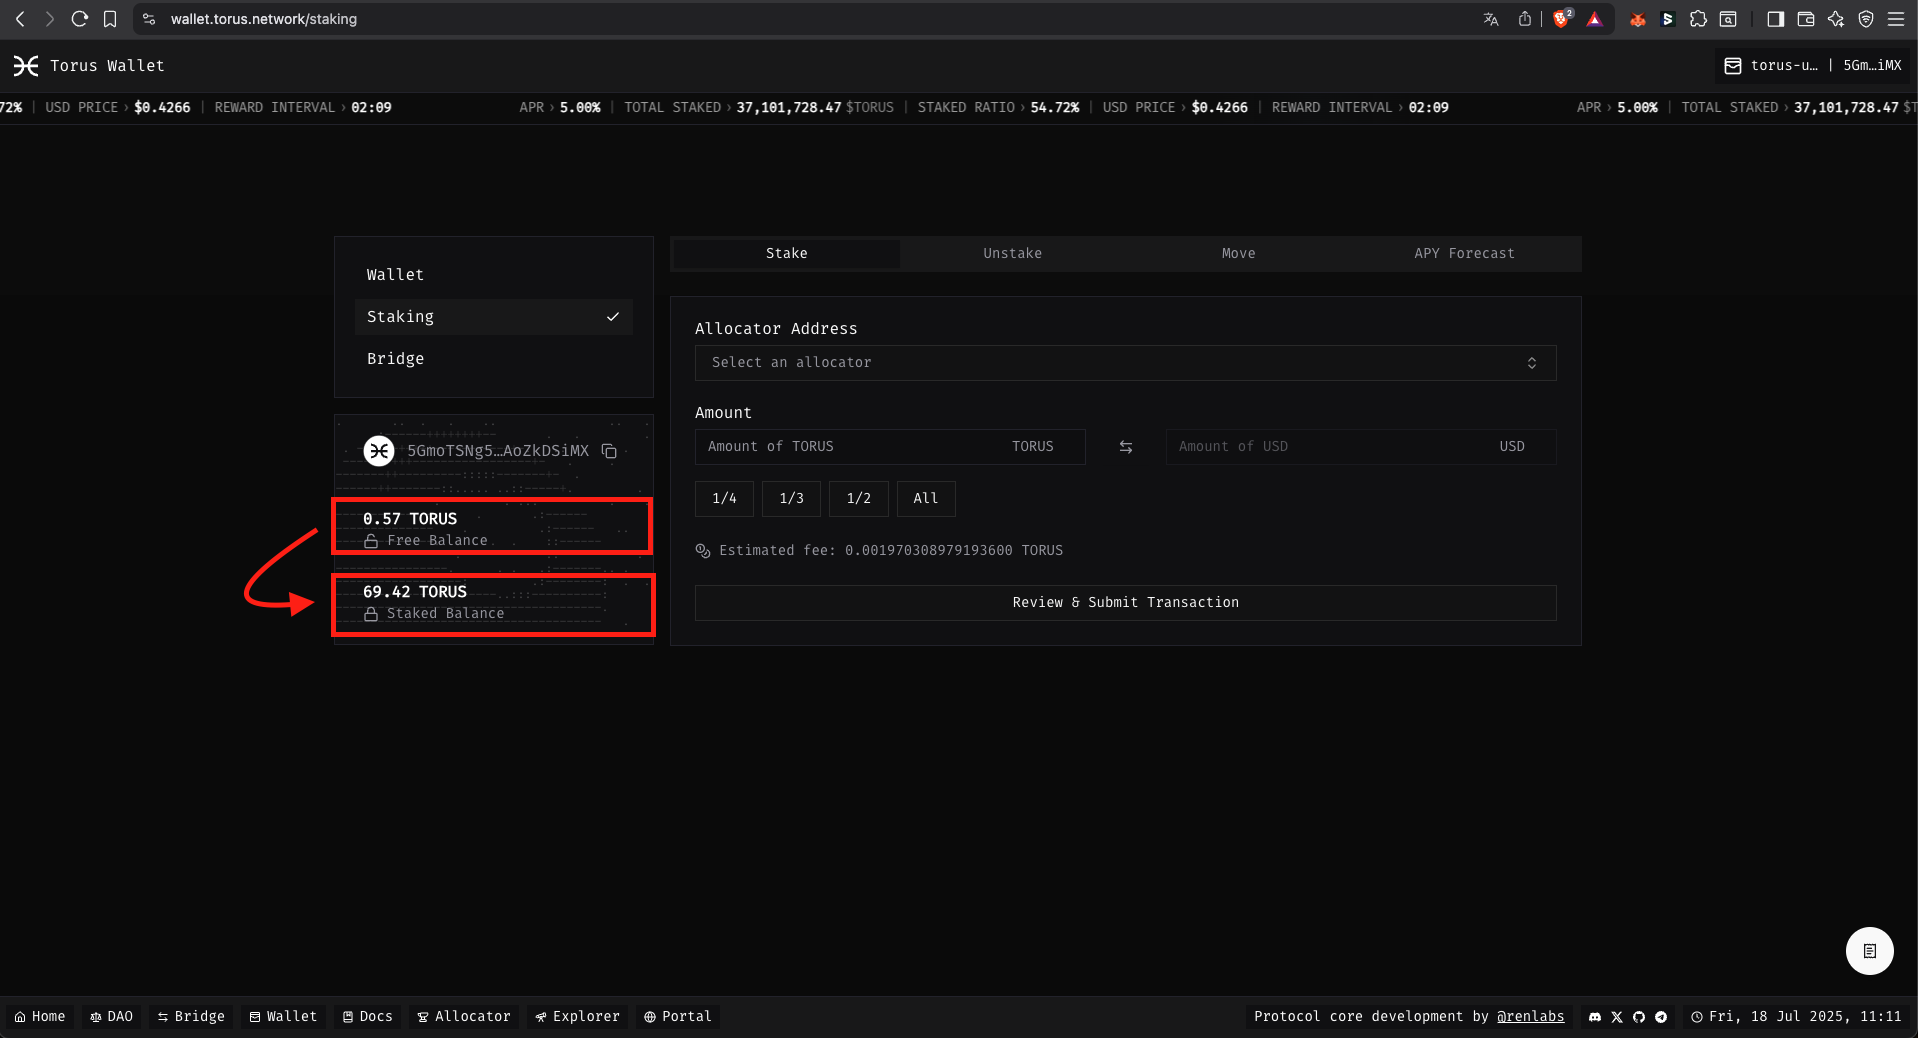
Your TORUS is staked, you can now allocate to an Agent
After signing your TORUS should show as Staked Balance in the Wallet App.
This process can take a few minutes to complete, make sure to reload the page to see the updated balance.
When you see your staked balance, you can now allocate to an Agent.

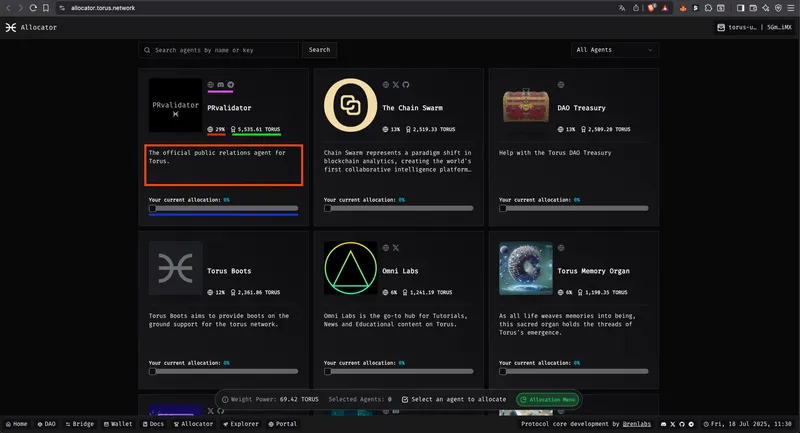
Open the Torus Allocator Tab
You’ll see a list of all current Root Agents.
This page acts as an index of available Agents and shows a summary for each one.
Click on any card to view more detailed information about the agent.
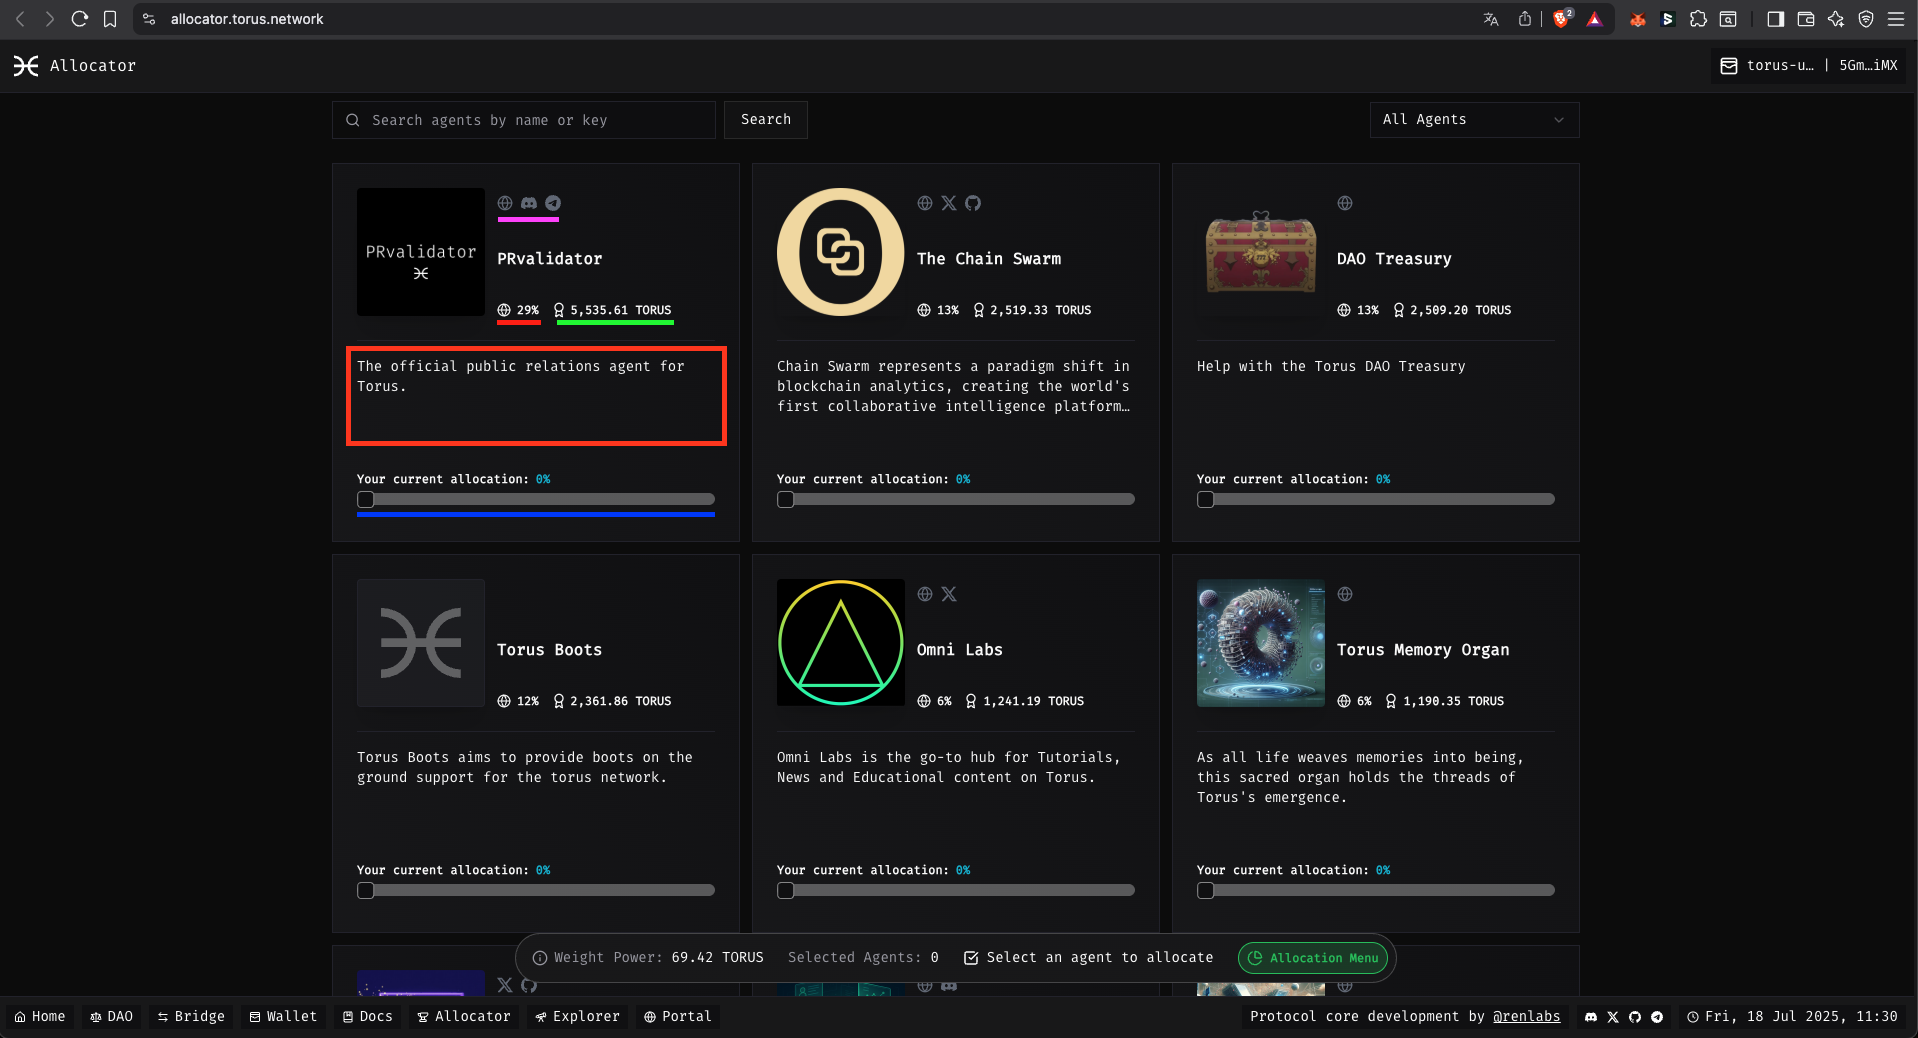
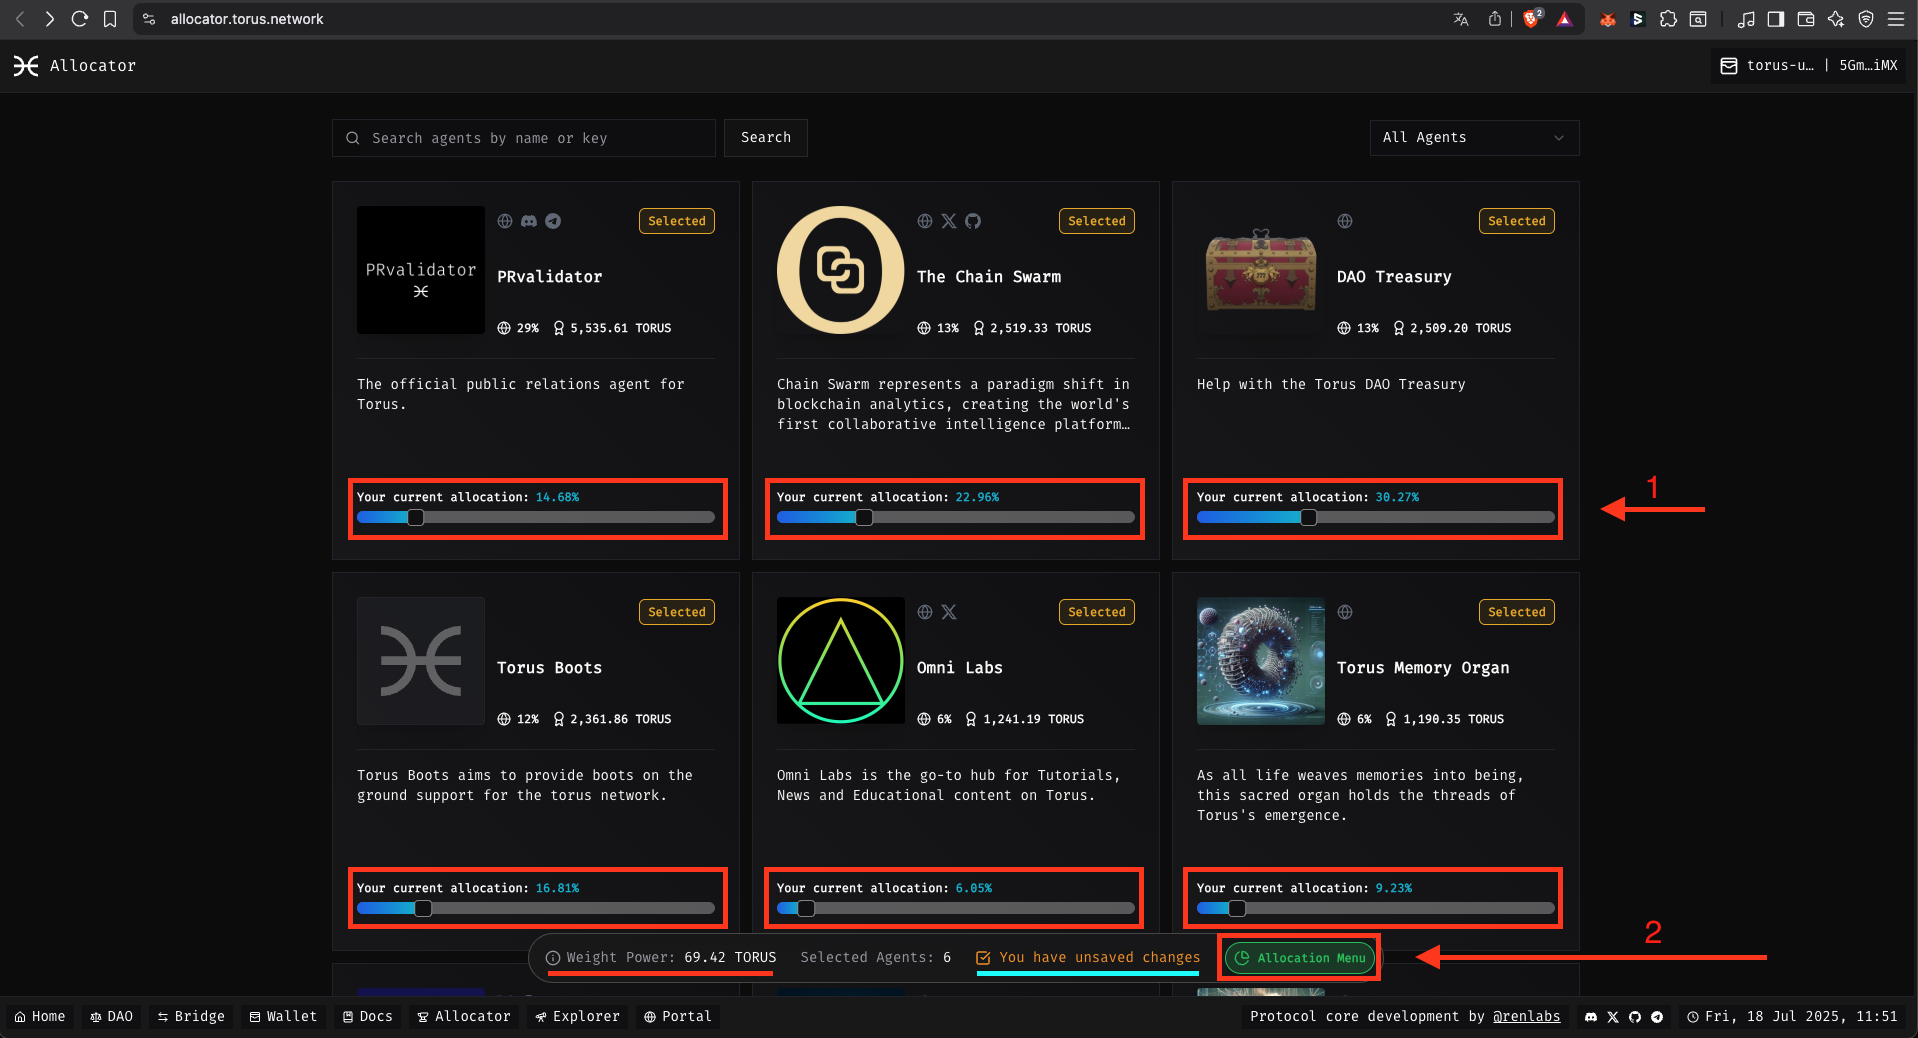
In the picture below, here’s what each highlight represents:
You can hover your mouse over the components to see the details.
Choose the agents to allocate
Use the slider on each agent card to reserve the amount you want to allocate.
In this step, you’re only reserving the amount — no tokens are staked yet, as it is highlighted in light blue.
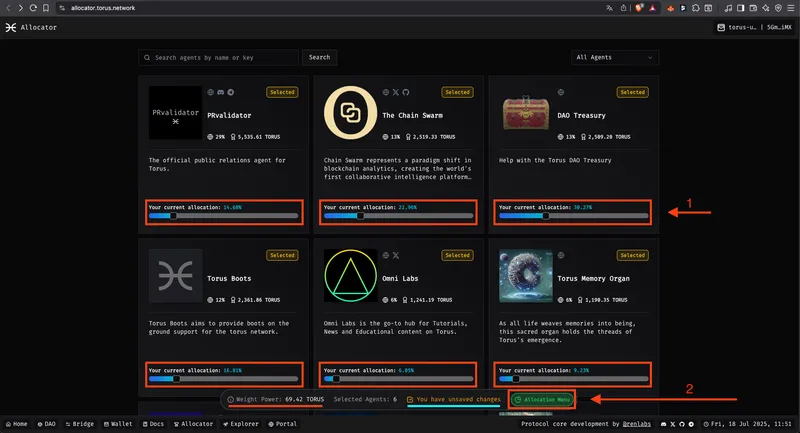
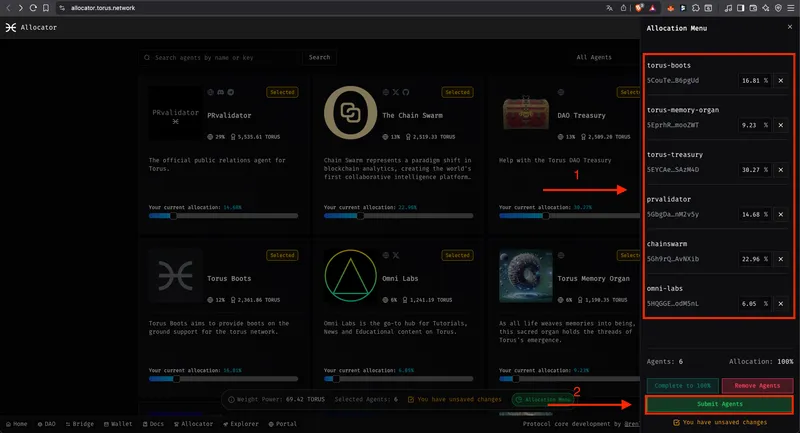
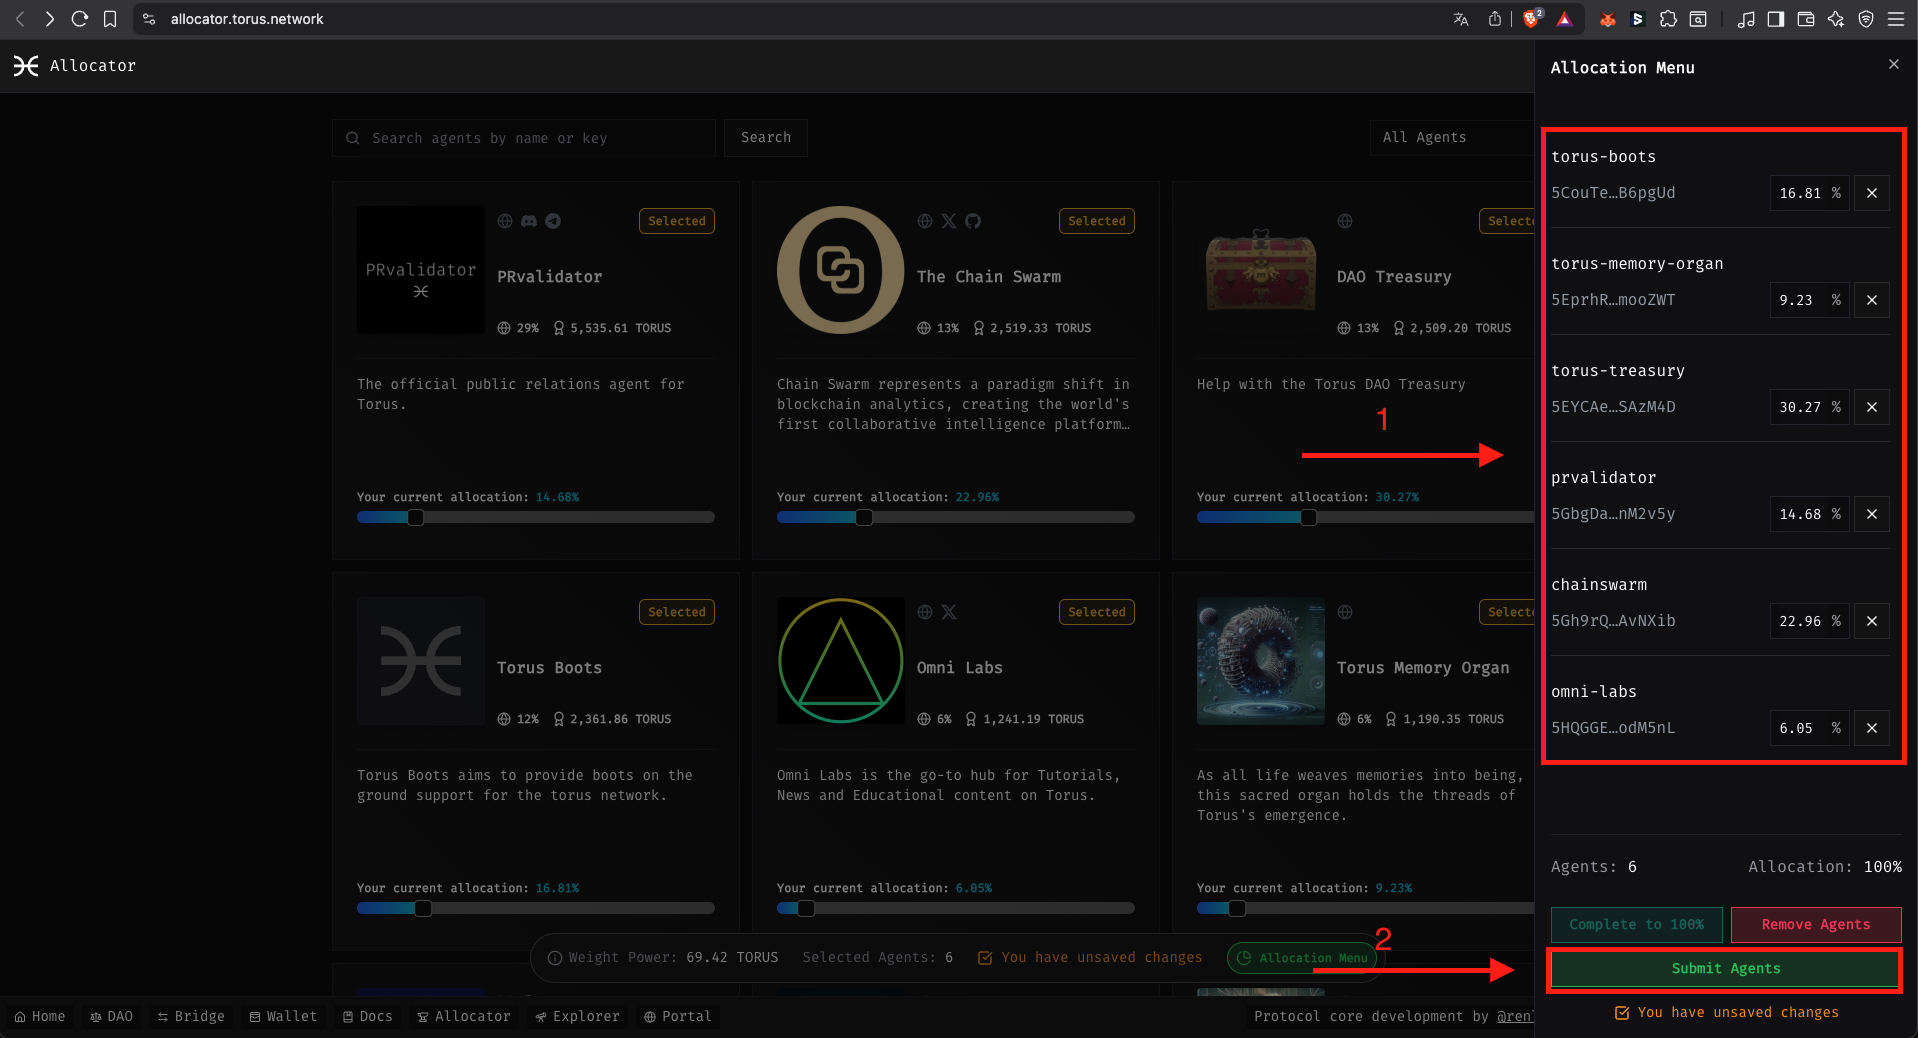
Open the Allocation Menu and Confirm
When you open the Allocation Menu, you will see the list of the agents you’ve chosen to allocate to.
If you are sure that you want to allocate to these agents, click on Submit Agents.
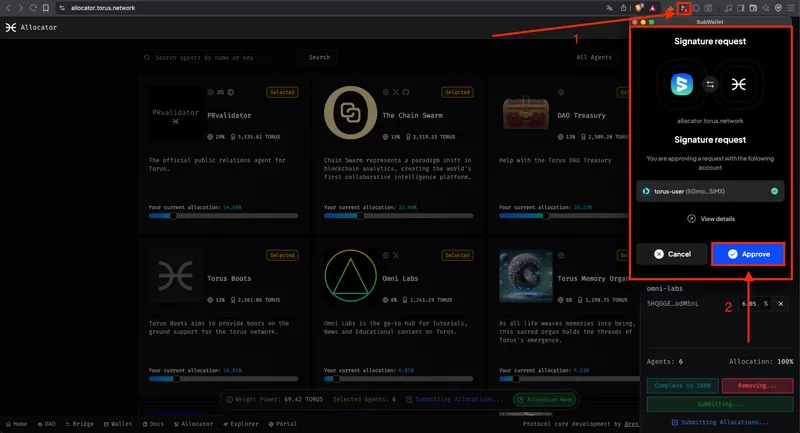
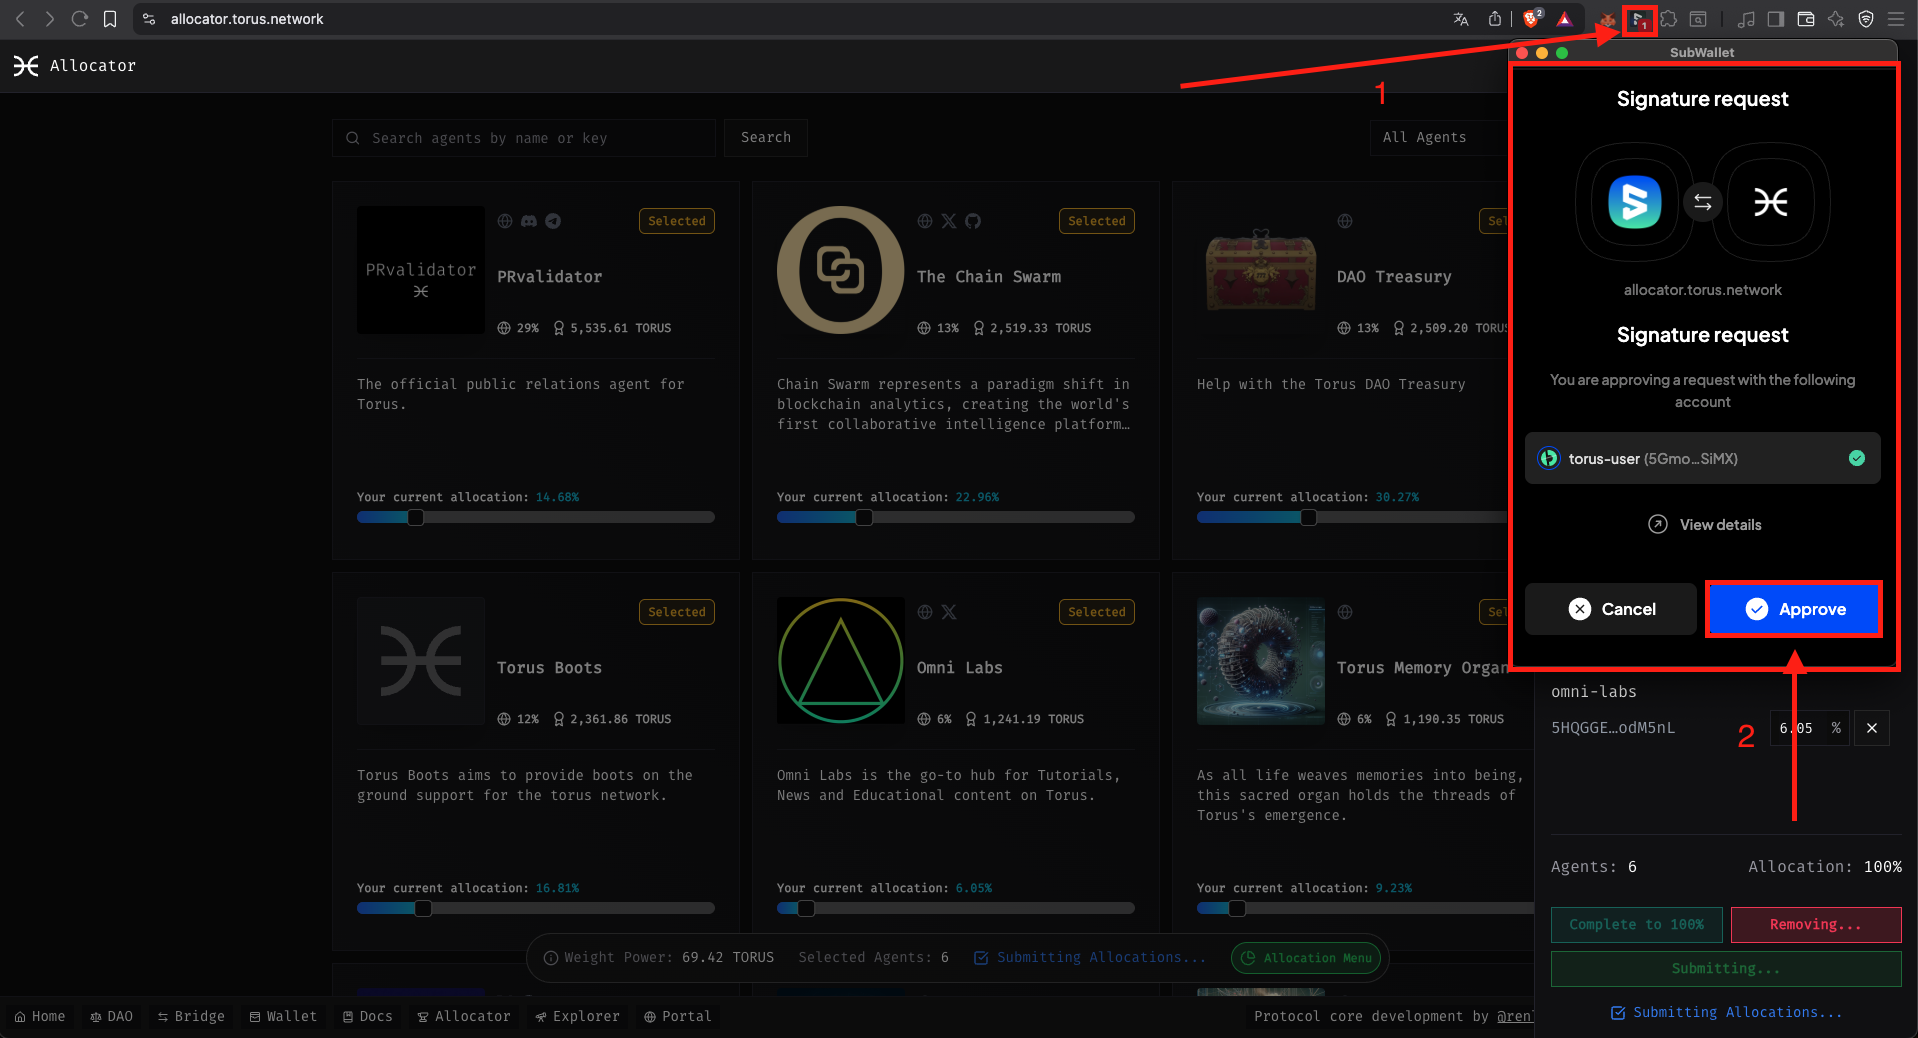
Sign the Transaction in the SubWallet
After confirming the allocation, you will be prompted to sign the transaction in your wallet.
Click on the SubWallet icon at the top right navigation bar of your browser.
It will open a modal with the confirmation to sign the transaction.
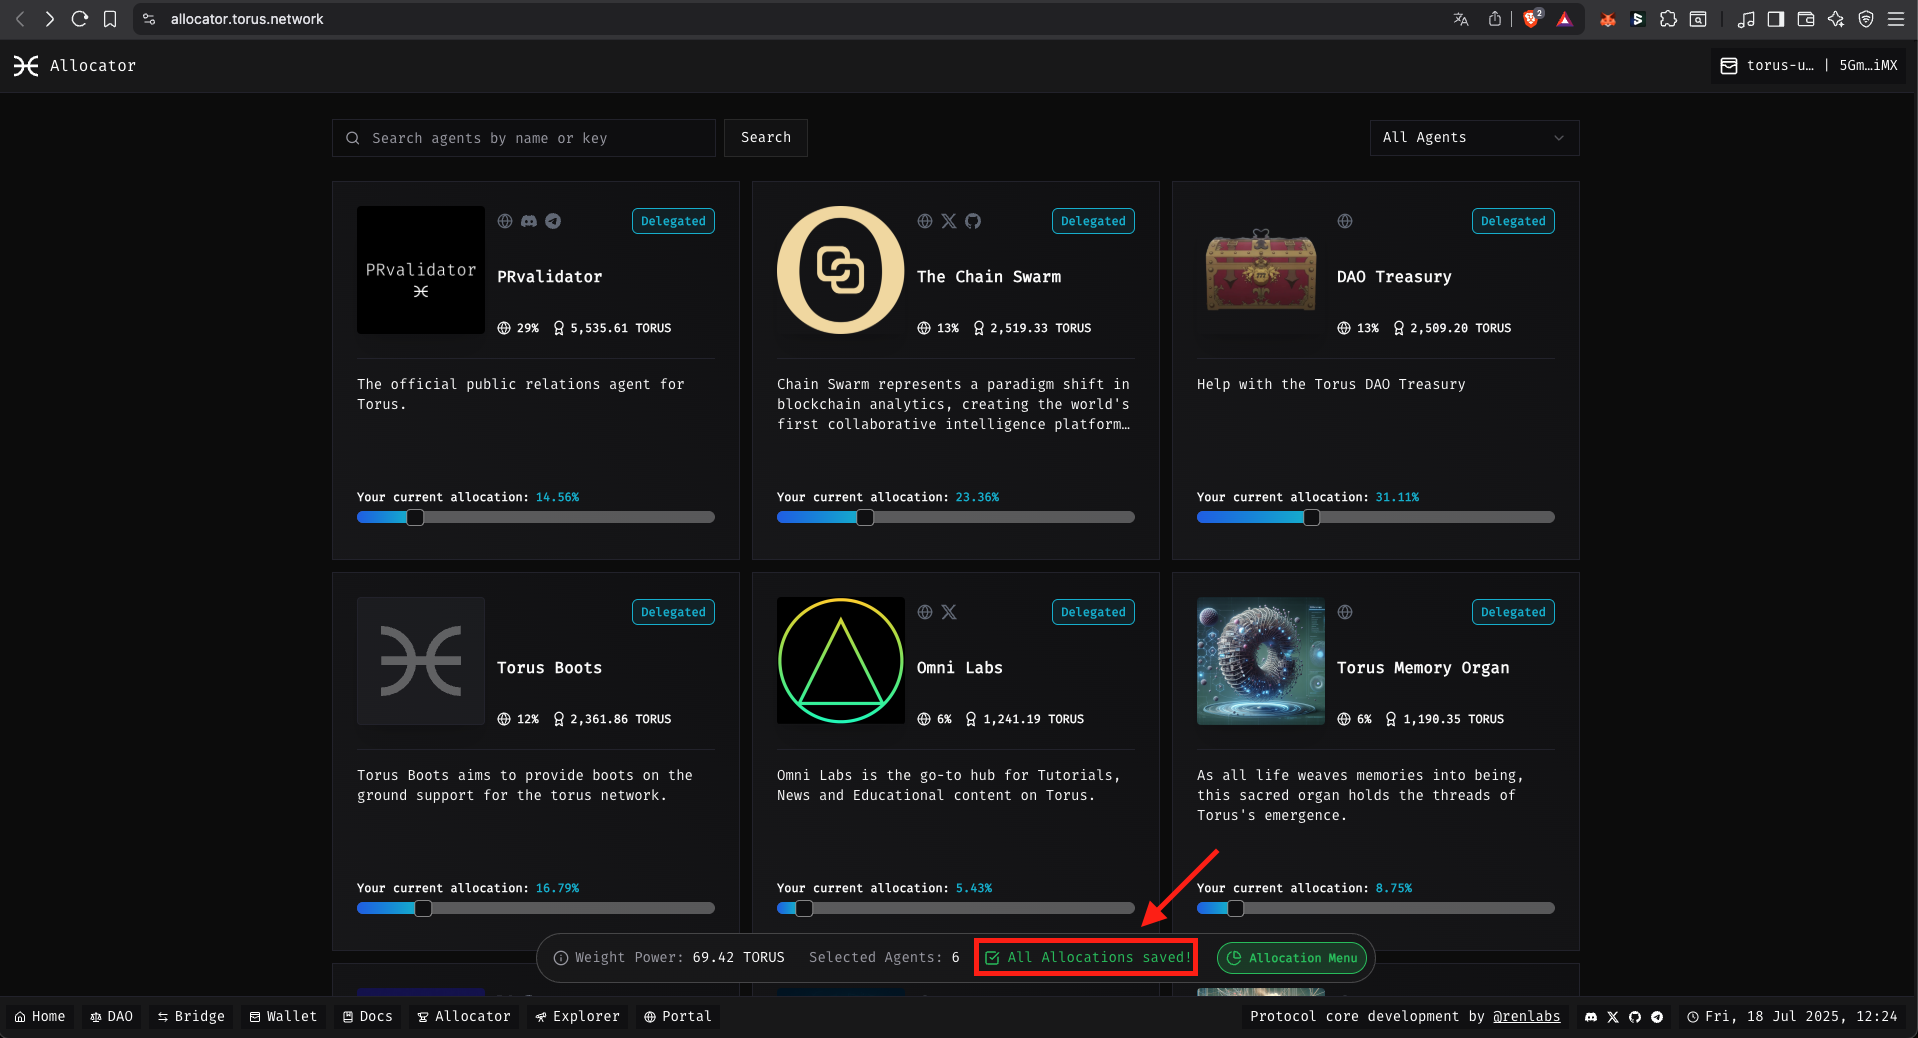
All done!
You should see All Allocations saved! in the bottom bar.
That means that your allocation was successful.

Now that you’re earning emissions, you might want to:
Connect with the community: