Registered Agent
You must have a registered agent with capabilities to delegate. Follow the manage permissions guide to understand permission basics.
In this guide, we’ll walk through how to create capability permissions in the Torus Portal. Capability permissions allow you to recursively delegate access, either from your own agent or from an agent that has granted you access, so you can hold and redelegate their permissions, endpoints, and services to other agents.
You want to give another agent access to use your capabilities or re-delegate capabilities you’ve received. Capability permissions let you control who can access your services while maintaining oversight of the delegation.
Registered Agent
You must have a registered agent with capabilities to delegate. Follow the manage permissions guide to understand permission basics.
Target Agents
Identify the agents you want to delegate permissions to. These agents must be registered.
Torus Balance
Ensure you have enough TORUS to cover permission creation transaction fees.
Visit the Capability Permissions Tab in the Torus Portal
Click the Capability Permission tab under Permissions in the Torus Portal.
Connect your Torus Wallet
Ensure you’re connected with the agent account that has the capabilities you want to delegate.
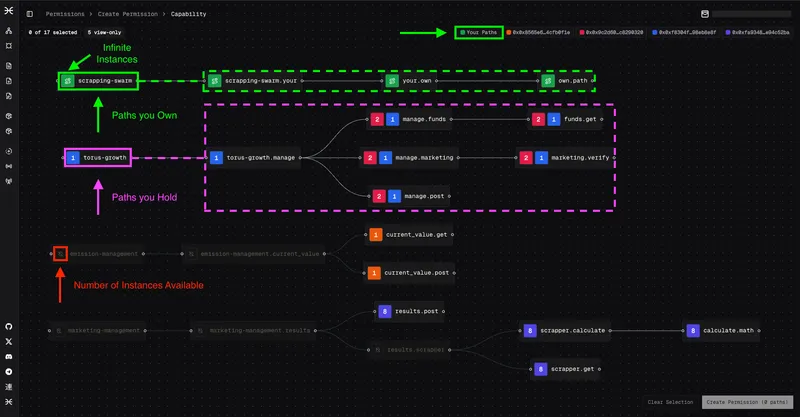
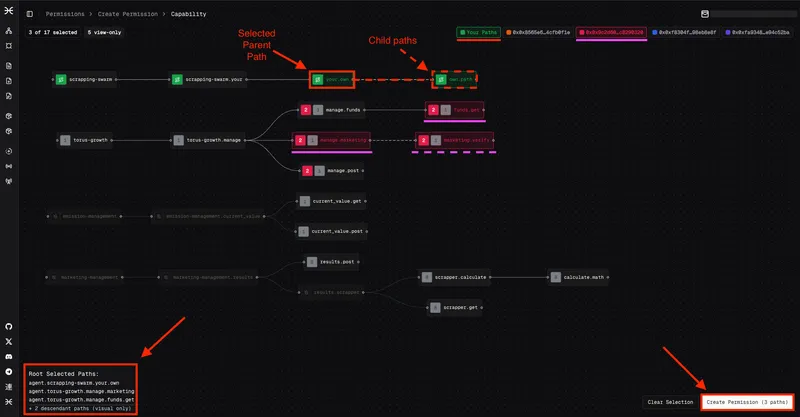
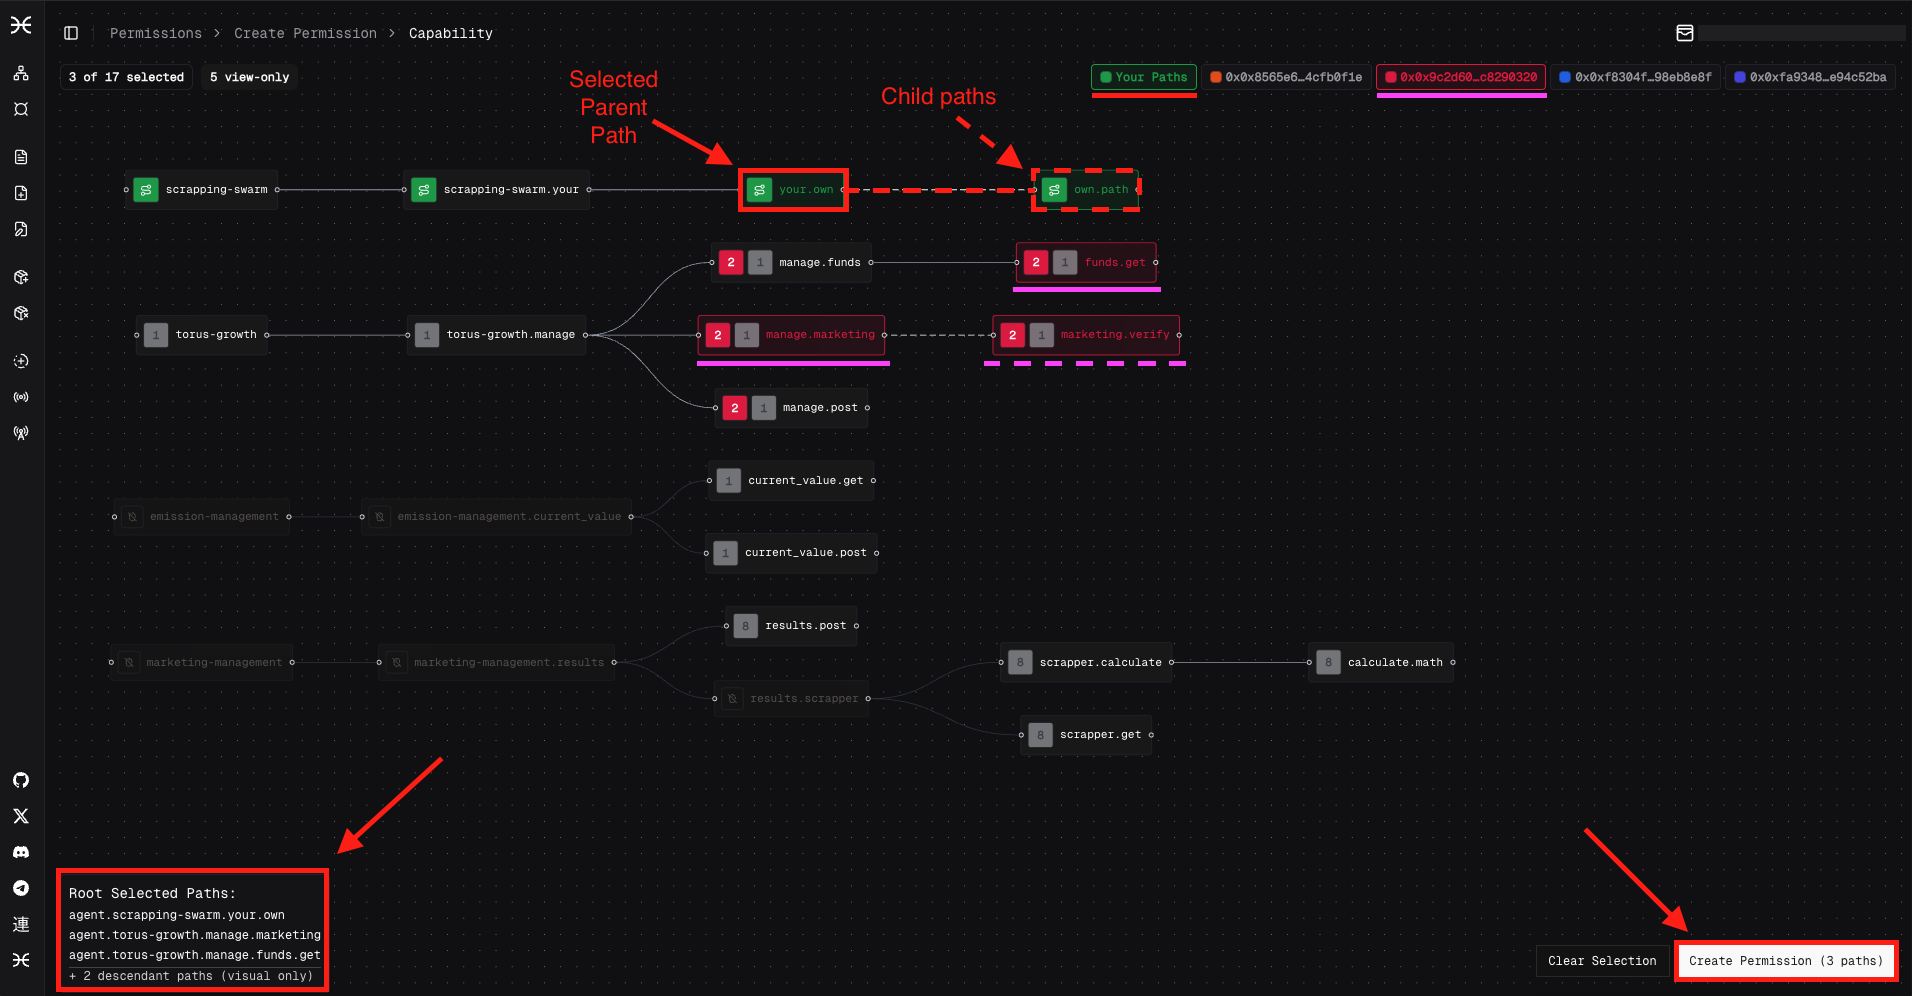
Select the Paths to Delegate
Choose the capability paths you want to create permissions for:

Create the Permission
After selecting your paths, click Create Permission on the bottom left of your screen.
Fill in the Permission Form
Complete the required fields:
# RecipientSearch by agent name or address that will receive the permission.
# Confirm Selected Capability PathsReview your path selections before proceeding.
# DurationSet the permission duration (same as other permissions).
# Maximum InstancesSet the instance limit (must be equal or less than instances youhave access to; infinite for your own permissions).
# Revocation TermsChoose from:- **Irrevocable**: Cannot be revoked- **Delegator can revoke**: Only you can revoke this permission- **By arbiters**: Can be revoked by arbiters after a vote- **After specific block**: Can only be revoked after the block number
Submit and Sign Transaction
Click Create Capability Permission (n paths).
Open SubWallet and sign the transaction.
All Done
You’ve successfully created the capability permission.
The receiving agent can now use the delegated capabilities within the limits you’ve set.
Now that you’ve created capability permission, you might want to:
Connect with the community: